5 Proven Steps to Master Cinematic Mobile Videography in 2026 for $10k/Month
Cinematic mobile videography is no longer just a hobby; it is a highly profitable, professional business system that allows creators to build massive value using only the smartphone in their pocket. In a digital economy where visual communication is paramount, businesses, content creators, and educators are constantly on the lookout for professionally designed visuals but often lack the time or technical skill to create them.
This creates a massive market gap. This shift demonstrates why cinematic mobile videography has become the gold standard for high-converting social media content. By mastering the foundational elements outlined in this guide, your work will instantly stand out from the noise of amateur content.
Today, attention has become a permanent asset on the internet. Every video you post acts as a piece of digital real estate that works for you while you sleep, building trust before a sale is ever made. Because modern audiences follow people rather than faceless logos, having a clear point of view on camera is the ultimate trust engine for any brand.
The “Quick Answer” / Key Takeaways Box
- The Power of the First Second: Potential clients decide to keep watching in under a second; your hook determines the algorithm’s reward for your video.
- The Technical Edge: Master the three-lens system and shoot in 4K at 60 FPS to maximize quality and provide the flexibility needed for professional editing.
- Seamless Transitions: Use the “Transition Triangle” (Same Texture, Same Direction, Same Speed) to create invisible, high-impact cuts that hold viewer attention.
- The Business Model: Stop charging by the hour. Charge for high-performing visual assets using tiered pricing, ad usage rights, and exclusive brand deal leverage systems.
1. Technical Foundations of Cinematic Mobile Videography
The first step to professional content creation is getting your camera setup right. You do not need expensive gimbals or professional cinema cameras to create stunning visuals; the smartphone in your pocket is more than capable if configured correctly. Every aspect of your camera setup should be optimized to support cinematic mobile videography.
The Phone Setup Checklist
Before recording any footage, spend three minutes configuring your phone settings to ensure clean, high-quality files.
- Resolution and Frame Rate: Always shoot in 4K UHD at 60 FPS. Shooting in 60 FPS (or higher, such as 120 FPS for slow motion) gives you the flexibility to slow down your footage smoothly in post-production.
- Clean the Lens: This sounds obvious, but a quick wipe removes pocket lint and grease that ruins image contrast and causes distracting light flares.
- Grid Lines: Turn on your camera grid lines to assist with the Rule of Thirds and ensure your horizons are perfectly level.
- Autofocus Lock: Prior to starting any movement, always tap and hold on your subject until the autofocus (AF) lock icon appears on the screen. A shot that shifts focus mid-movement looks highly amateur.
- No Digital Zoom: Walk closer to your subject instead of pinching the screen. Digital zoom crops the sensor and destroys image resolution.
Understanding Your Lenses
Most creators use a single lens for everything, which results in monotonous, flat content. To shoot professional cinematic mobile videography, you must utilize the Three-Lens System intentionally:
- Ultra-Wide Lens: Use this for establishing shots. It gives the viewer a sense of scale and introduces the environment. Move the camera in toward the space, inviting the viewer to enter the scene. Hold these shots for three to four seconds.
- Wide Lens: This is your main presence lens, ideal for capturing character, unique selling points, and localized action. It has less distortion than the ultra-wide lens but more character than a standard crop.
- Telephoto Lens (Zoom): This lens is where visual magic happens. Zooming in close allows you to capture texture, hands, and details that other lenses miss. Use this lens almost exclusively for food close-ups, steam rising from coffee, or detailed product shots.
Body Stability and Movement
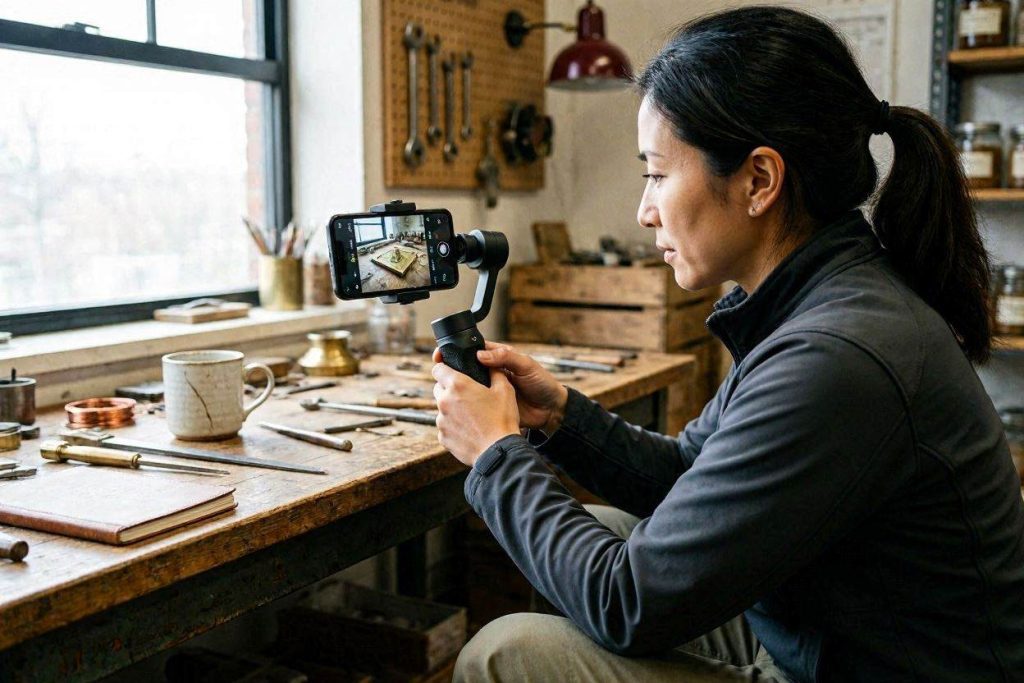
Your body is the ultimate gimbal. Relying on digital stabilization inside editing apps can often warp your footage and reduce quality. Instead, master these physical habits:
- Two Hands: Always hold your phone with both hands for moving shots to minimize jitter.
- Core Engagement: Tighten your core and bend your knees slightly to lower your center of gravity.
- Torso Rotation: For panning movements, rotate your entire torso slowly from your hips rather than turning your wrists. Your upper body is far more stable than your hands.
- One Direction: Stop aimlessly waving the phone around. Commit to a single direction of movement per shot (forward, backward, left to right, up or down), hold it for three to four seconds, and cut.
2. Storytelling and Content Systems
Cinematic mobile videography is only effective if it tells a story. Beautiful footage without a narrative structure is just empty b-roll. Every piece of content must apply a repeatable framework.
The Movie, Scene, and Hero Shot Framework
When capturing a business or location, avoid the mistake of filming a generic room tour. Instead, think like a film director:
- The Movie: This is the broad concept (e.g., a hotel, a restaurant, or a launch event).
- The Scene: Break the movie down into individual chapters. One reel should cover exactly one scene and evoke one clear emotion.
- The Hero Shot: Every scene must have a single defining moment. The hero shot is the frame that immediately explains what is happening and makes the viewer feel something (e.g., room keys being placed in a palm, or a pastry being torn open). Build the beginning and the ending entirely around this hero shot.
The Hook, Value, and CTA Formula
For talking-head or educational content, structured presentation is critical. Every video must follow a classic formula:
- Hook: Your first line must stop the scroll. It should create an open loop, state a concrete detail, or leverage identity.
- Value: Deliver one clear, actionable point. Keep it simple and direct.
- CTA (Call to Action): Direct the audience to take a single, specific action, such as sharing the video, saving it for later, or commenting.
[EXTERNAL LINK: How to Plan Viral Video Content for Social Media]
3. Visual Magic: Transition Systems and Chroma Keying
Transitions are not cheap gimmicks; they are visual punctuation marks that preserve flow and hold viewer attention. When done correctly, they feel invisible, pulling the viewer deeper into the narrative.
The Transition Triangle
Every seamless in-camera transition is governed by three non-negotiable rules:
- Same Texture: The surface or object used to cover the lens at the end of Clip 1 must visually match the surface used to pull away from in Clip 2 (e.g., white wall to white wall, or hand to hand).
- Same Direction: You must commit to a single direction of movement across the cut. If you swing the phone fast to the left to exit, you must start the next shot swinging fast to the left to enter.
- Same Speed: The pace of camera movement must remain identical across the edit. Speed creates seamlessness, whereas slow, hesitant movements expose the cut.
Master the Chroma Key Portal
The green screen transition—also known as the portal—teleports you between locations. By holding a green screen panel in front of your lens, you create a natural wipe that can be keyed out in post-production, leaving a flawless change of scenery.
- The Normal Portal: You walk toward the camera holding the green panel until it fully covers the lens. In Clip B, you start with the panel over the lens at a new location and pull it away.
- The Reverse Portal: The clip begins with 100% green filling the frame. The screen pulls back to reveal you already standing in a high-impact, dramatic location. This signals surprise and arrival.
[IMAGE PLACEHOLDER: A creator performing a green screen portal transition. Alt text: cinematic mobile videography portal transition]
To ensure a flawless chroma key, prevent “green bleeding.” This occurs when light reflects off the green panel onto your skin or hair. Prevent this by filming in a dark environment with minimal reflections, keeping distance between you and the panel, and avoiding reflective clothing.
4. Post-Production: Editing, Color Grading, and Audio
Stunning capture is only half the battle; professional post-production transforms raw phone footage into a polished film. While multiple apps exist, a professional mobile editor like LumaFusion is recommended for its precise timeline control and robust chroma key engines.
The Professional Editing Workflow
When setting up a project, rotate your device to edit in landscape mode to maximize your timeline view. Create a new project, set the frame rate to 60 FPS, and select a 9:16 aspect ratio for vertical reels.
Mute your main video timeline to remove distracting ambient background noises, as you will add curated music and clean voiceovers separately. To edit, import your clips and trim them down to essential frames. Most cinematic clips should be trimmed to a brisk two to four seconds to maintain pace.
To add a signature cinematic feel, use the keyframe zoom hack:
- Double-click your clip on the timeline and enter the “Frame & Fit” editor.
- Add a keyframe at the very first frame of your clip with scale set to 100%.
- Move to the very last frame, add a second keyframe, and increase the scale to 110%.
This generates a slow, smooth, dreamy zoom that keeps the shot dynamic. For audio, utilize the screen recording trick: record the music playing on your phone, drag that file into the audio timeline, and the app will automatically strip the audio. You can then edit your clips precisely to the beat of the track.
The Color Grading Protocol
Color grading is what separates basic phone clips from a high-impact film. This is accomplished using LUTs (Look-Up Tables), which act as color presets to shift highlights, shadows, and contrast. Never apply a LUT directly onto raw footage without preparation. Always follow this exact order of operations:
- White Balance: Correct the temperature first if your clip is too warm or too cool.
- Exposure Compensation: Adjust exposure and contrast to ensure the clip is perfectly balanced before color is applied.
- Apply the LUT: Apply the LUT and adjust the intensity slider. Most LUTs look best when dialed down to 60% to 80% intensity.
Match your color grade to the story. Use a “Hotel Suite” profile (crushed shadows, desaturation) for interiors, or a “Cinematic Cool” profile (teal shadows, warm skin tones) for moody, urban scenes. When exporting, use 1080p HD at 60 FPS. Avoid exporting in 4K, as social platforms will aggressively compress those files, ruining your visual quality.
[INTERNAL LINK: Mastering the Perfect Color Grade for Social Content]
5. The Creator Business Model: Client Acquisition
Mastering cinematic mobile videography is a highly valuable skill, but its true power lies in turning it into a thriving business. You are not charging for your hours; you are charging for a finished, high-performing visual asset that brings attention and revenue to a business.
The Cold Outreach Strategy: Specific, Short, Soft
To sign your first clients, execute five highly targeted cold DMs every day. Avoid copy-pasting generic messages, as business owners delete these instantly.
- Specific: Open with the business owner’s real name and a genuine compliment about their page.
- Short: Introduce yourself as a videographer and offer a concrete POV on how their content could perform better.
- Soft Close: End with a low-pressure offer to shoot a single cinematic reel for free as a proof of concept.
In your first three months, working for free with an established brand is a highly effective leverage strategy. You are trading your time to buy high-value portfolio assets and credibility.
Dynamic Pricing and Retainer Tiers
Once you have built your portfolio, transition into paid packages. Use the 5-Reel Monthly Bundle as your anchor offer. Structure your services across clear pricing tiers:
| Metric / Deliverable | Tier 1: Starting Out | Tier 2: Building | Tier 3: Established |
| Single Reel | $75 | $150 – $300 | $300 – $750 |
| 5-Reel Bundle | $350 (Anchor) | $600 – $1,200 | $1,500 – $3,500 |
| Full-Day Shoot | $700 | $1,200 – $1,800 | $2,000 – $3,000 |
Rule of Negotiation: If a client pushes back on price, never lower your rate. Instead, reduce the scope of work (e.g., offer three reels instead of five). This protects your per-unit value and establishes you as a serious business.
Brand Deal Leverage Systems
When negotiating larger brand deals, stop quoting a single flat rate. A brand deal is a stack of distinct decisions, and you must charge for the rights, not just the file. Use these five levers:
- Ad Usage (Paid Media): Charge an extra 50% for sponsored social ads.
- Category Exclusivity: Charge an additional 20% to 30% to prevent working with competitors.
- Usage Duration: Tier rights by timeline (3 months base, 6 months +20%, 12 months +40%, perpetual +60%).
- White Labeling: Add 30% to 50% if the brand posts without collaboration.
- Re-editing Rights: Add 15% to 25% if the brand wants to re-cut your raw footage.
By stacking these, a $1,000 base rate can easily scale to $2,450 or more for the exact same shoot.
Strategic Critique: Stress-Testing the Concept
What are the problems with this idea that we are not seeing?
The main issue is the saturation of the “content creator” market. While everyone has a phone, few have the discipline to learn professional framing and color grading. Furthermore, high-ticket clients are increasingly wary of “social media videographers” who produce flashy edits that don’t drive actual sales. The problem isn’t the ability to shoot; it’s the ability to demonstrate ROI.
What assumptions are we making that might not be true?
We assume that business owners know how to leverage the videos we provide. Often, a high-quality video will fail to convert if the client’s own website or sales funnel is poorly optimized. We also assume that clients are always willing to pay a premium for mobile footage, whereas some hold an outdated bias that “cinematic” requires a dedicated DSLR or cinema camera.
If this idea failed, what would be the most likely reason?
The failure would likely stem from poor client acquisition and a lack of specialization. If you position yourself as a “generalist videographer,” you will be constantly underbid by amateurs. You must specialize in a niche where you can prove that your videos directly increase revenue (like e-commerce products, real estate, or high-end hospitality).